Connect Private GitHub Repository to Tabby

A few months ago, we published a blog Repository context for LLM assisted code completion, introducing the Repository Context feature in Tabby. This feature has been widely embraced by many users to incorporate repository-level knowledge into Tabby, thus improving the relevance of code completion suggestions within the working project.
In this blog, I will guide you through the steps of setting up a Tabby server configured with a private Git repositories context, aiming to simplify and streamline the integration process.
Generating a Personal Access Token
In order to provide the Tabby server with access to your private Git repositories, it is essential to create a Personal Access Token (PAT) specific to your Git provider. The following steps outline the process with GitHub as a reference:
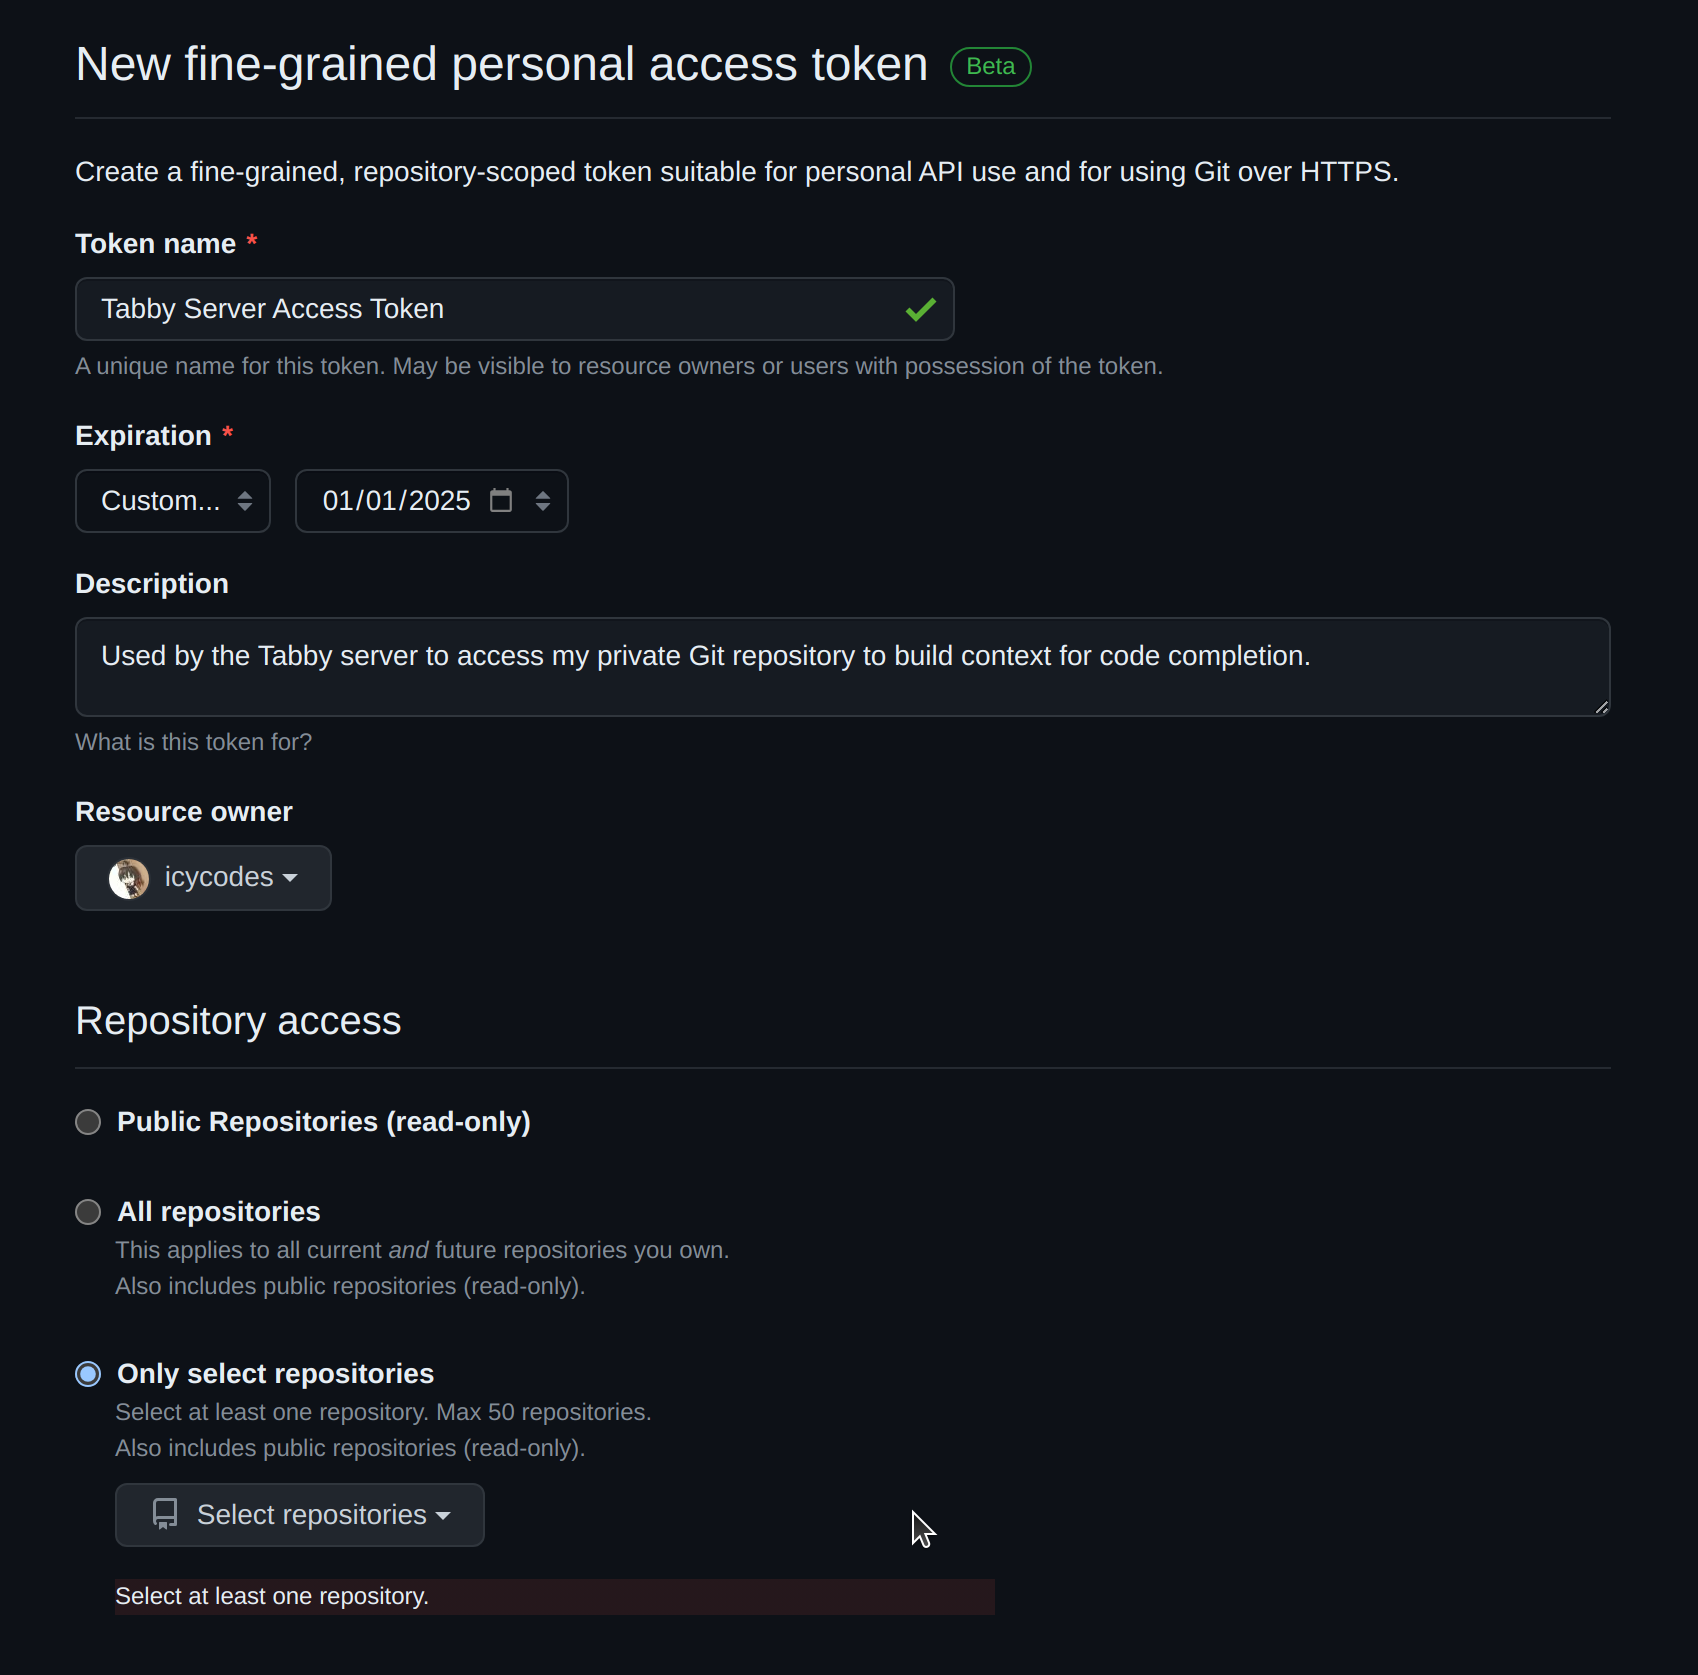
1. Visit GitHub Personal Access Tokens Settings and select Generate new token.

2. Enter the Token name, specify an Expiration date, an optional Description, and select the repositories you wish to grant access to.

3. Within the Permissions section, ensure that Contents is configured for Read-only access.

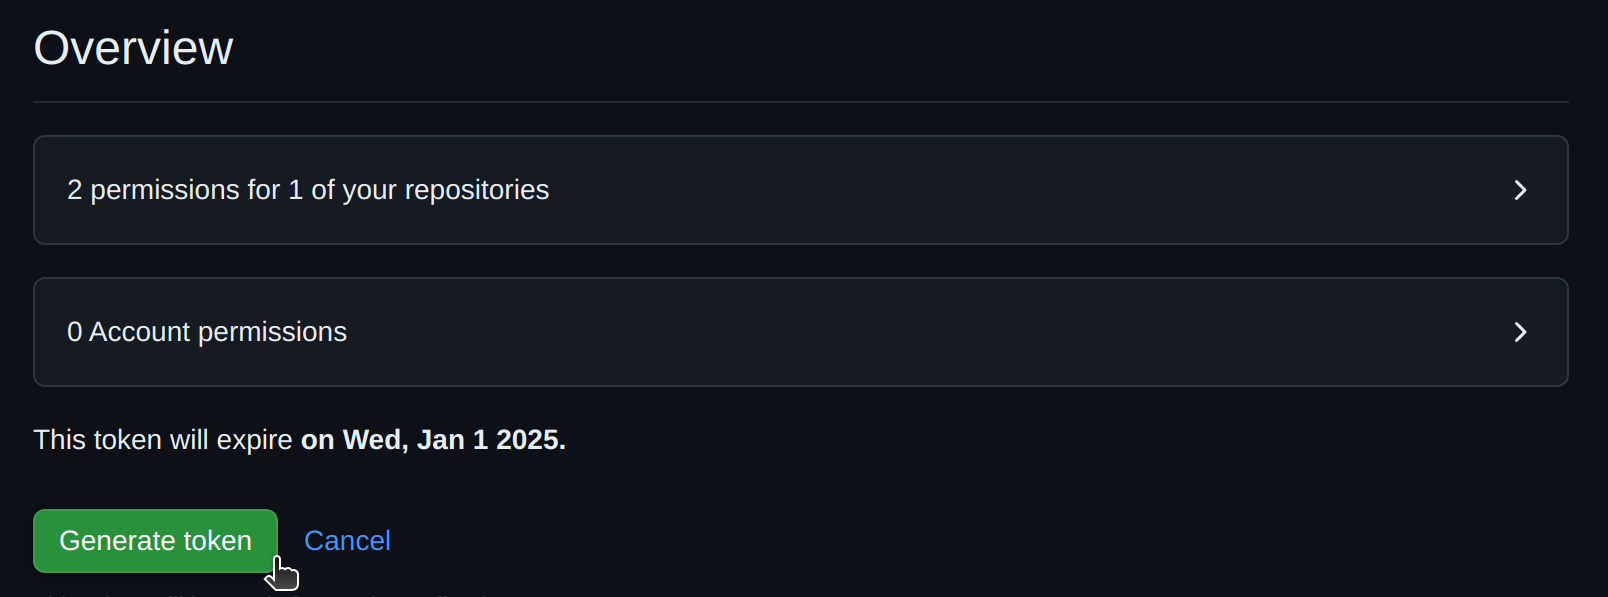
4. Click Generate token to generate the new PAT. Remember to make a copy of the PAT before closing the webpage.

For additional information, please refer to the documentation on Managing your personal access tokens.Note: For users of GitLab, guidance on creating a personal access token can be found in the documentation Personal access tokens - GitLab.
Configuration
To configure the Tabby server with your private Git repositories, you need to provide the required settings in a TOML file. Create and edit a configuration file located at ~/.tabby/config.toml:
## Add the private repository
[[repositories]]
name = "my_private_project"
git_url = "https://<PAT>@github.com/icycodes/my_private_project.git"

## More repositories can be added like this
[[repositories]]
name = "another_project"
git_url = "https://<PAT>@github.com/icycodes/another_project.git"
For more detailed about the configuration file, you can refer to the configuration documentation.
Note: The URL format for GitLab repositories may vary, you can check the official documentation for specific guidelines.
Building the Index
In the process of building the index, we will parse the repository and extract code components for indexing, using the parser tree-sitter. This will allow for quick retrieval of related code snippets before generating code completions, thereby enhancing the context for suggestion generation.
Once the configuration file is set up, proceed with running the scheduler to synchronize git repositories and construct the index. In this scenario, utilizing the tabby-cpu entrypoint will avoid the requirement for GPU resources.
docker run -it --entrypoint /opt/tabby/bin/tabby-cpu -v $HOME/.tabby:/data tabbyml/tabby scheduler --now
The expected output looks like this:
icy@Icys-Ubuntu:~$ docker run -it --entrypoint /opt/tabby/bin/tabby-cpu -v $HOME/.tabby:/data tabbyml/tabby scheduler --now
Syncing 1 repositories...
Cloning into '/data/repositories/my_private_project'...
remote: Enumerating objects: 51, done.
remote: Total 51 (delta 0), reused 0 (delta 0), pack-reused 51
Receiving objects: 100% (51/51), 7.16 KiB | 2.38 MiB/s, done.
Resolving deltas: 100% (18/18), done.
Building dataset...
100%|████████████████████████████████████████| 12/12 [00:00<00:00, 55.56it/s]
Indexing repositories...
100%|████████████████████████████████████████| 12/12 [00:00<00:00, 73737.70it/s]
Subsequently, launch the server using the following command:
docker run -it --gpus all -p 8080:8080 -v $HOME/.tabby:/data tabbyml/tabby serve --model StarCoder-1B --device cuda
The expected output upon successful initiation of the server should like this:
icy@Icys-Ubuntu:~$ docker run -it --gpus all -p 8080:8080 -v $HOME/.tabby:/data tabbyml/tabby serve --model StarCoder-1B --device cuda
2024-03-21T16:16:47.189632Z  INFO tabby::serve: crates/tabby/src/serve.rs:118: Starting server, this might take a few minutes...
2024-03-21T16:16:47.190764Z  INFO tabby::services::code: crates/tabby/src/services/code.rs:53: Index is ready, enabling server...
ggml_init_cublas: GGML_CUDA_FORCE_MMQ:   no
ggml_init_cublas: CUDA_USE_TENSOR_CORES: yes
ggml_init_cublas: found 1 CUDA devices:
  Device 0: NVIDIA GeForce RTX 4090, compute capability 8.9, VMM: yes
2024-03-21T16:16:52.464116Z  INFO tabby::routes: crates/tabby/src/routes/mod.rs:35: Listening at 0.0.0.0:8080
Notably, the line Index is ready, enabling server... signifies that the server has been successfully launched with the constructed index.
Verifying Indexing Results
To confirm that the code completion is effectively utilizing the built index, you can employ the code search feature to validate the indexing process:
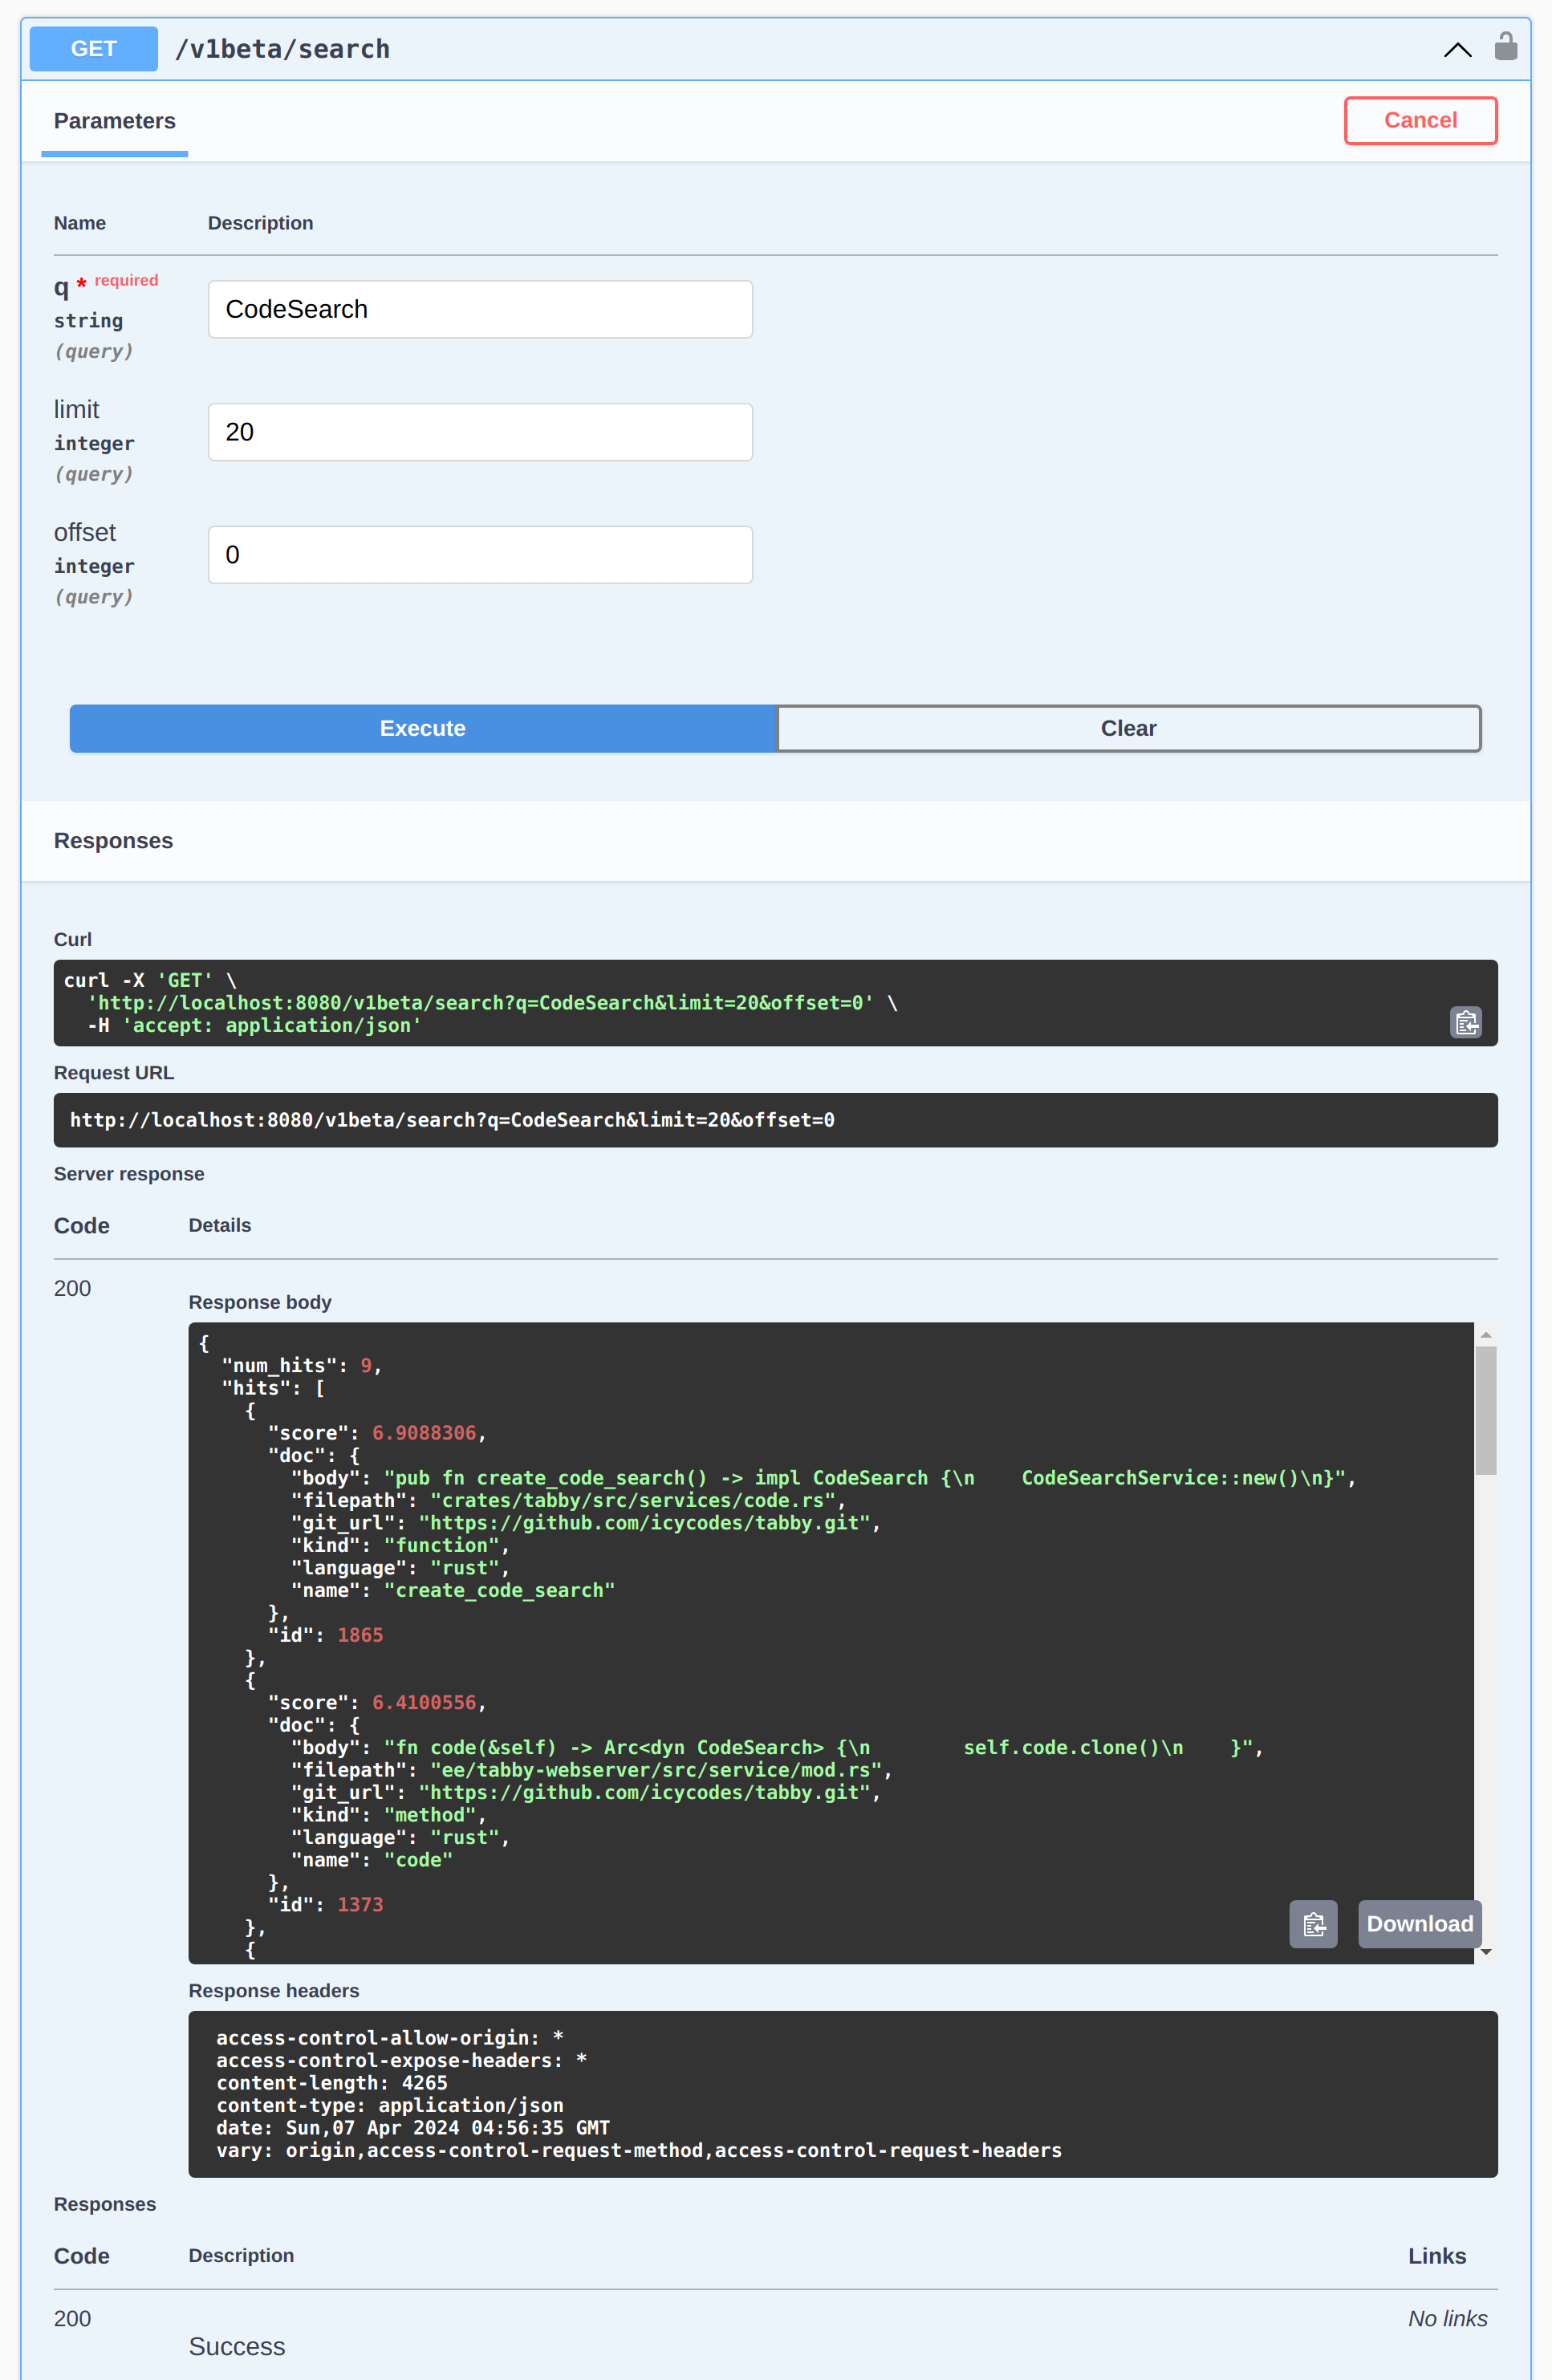
- Access the Swagger UI page at http://localhost:8080/swagger-ui/#/v1beta/search.
- Click on the
Try it outbutton, and input the query parameterqwith a symbol to search for. - Click the
Executebutton to trigger the search and see if there are any relevant code snippets was found.
In the screenshot below, we use CodeSearch as the query string and find some code snippets related in the Tabby repository:

Alternatively, if you have utilized the code completion with the constructed index, you can examine the server log located in ~/.tabby/events to inspect how the prompt is enhanced during code completion.
Additional Notes
Starting from version v0.9, Tabby offers a web UI to manage your git repository contexts. Additionally, a scheduler job management system has been integrated, streamlining the process of monitoring scheduler job statuses. With these enhancements, you can save a lot of effort in maintaining yaml config files and docker compose configurations. Furthermore, users can easily monitor visualized indexing results through the built-in code browser. In the upcoming v0.11, a new feature will be introduced that enables a direct connection to GitHub, simplifying and securing your access to private GitHub repositories.
For further details and guidance, please refer to administration documents.
Discover Tabby Unlock Your Coding Potential
Get Started with our Community Plan Today
Simple self-onboarding
Free community plan
Local-first deployment
Explore Full Features with Team or Enterprise Plans
Enterprise-first experience
Flexible deployment options
Enhanced security support
.avif)


.png)